There are two methods to install our Umbraco Font Awesome Extension:
- via nuget (the package manager for Visual Studio)
- or, the Umbraco back office
Installation via nuget
Open visual studio, then the nuget property package manager console, type the following to install the package.
PM> Install-Package FontAwesomePropertyEditor
Installation via the Umbraco back office
In the packages section search for "u8 fontawesome links".

Locate our Font Awesome Property editor in the Umbraco back office.
Then click "install package", on the next screen check "I accept terms of use" then click the install package button.
Font Awesome Property Editors
There are three property editors installed, one is for adding Font Awesome Icons to your document, the other is for adding Font Awesome Links and the last is for adding buttins. Links allow you to have a list of links each with a pickable icon, whilst Icons don't have an associated link, it's just a pickable icon.
The three editors:
- Font Awesome Icon
- Font Awesome Links
- Font Awesome Buttons
Font Awesome Icon
To add an icon to your documents types select your document then add a property of type "Font Awesome Icon".
Next, set the configuration for the property. When naming, it is good practice to name the the editor based on the configuration chosen. So if the configuration has no minimum or maximum number of items picked then I would name the editor "Font Awesome Icon (no min - no max)".
If I want only one icon to be picked, then I can set the minimum number of items to 0, and the max to 1. I would call the editor "Font Awesome Icon (no min - max 1)".
Using a naming convention like this means that it's quick and easy to reuse the property editor on different document types.
After setting up the editor it's ready to be used when creating a property on your document. Add a name for your property as normal as well as your property description, save the changes, then you are ready to go.
Using a single icon in your front-end razor view
When the property editor is configured to have a maximum of one item then the strongly typed property will be a single instance of the class.
To use this property in your view you should add a reference to the the Font Awesome models classes. Add the following code for a single icon:
@using FaLinksPropertyEditor.ModelsThen depending which mode of models builder you have, where my property is called blogIcon, to get the strongly typed model value (without models builder) you can then use:
var blogIcon = Model.Value<FaLinksPropertyEditor.Models.FaIcon>("blogIcon");
You can then access the strongly typed properties on blogIcon, there are two ways to render the icons. The first way, is to use the class name (prefered):
<div>
    <span class="icon">
        <i class="@blogIcon.ClassName"></i>
    </span>
</div>
The second way is to output the svg directly:
<div>
    <span class="icon">@Html.Raw(blogIcon.Svg)</span>
</div>
Or if you are inheriting from your model and using models builder, you can access the property directly. Where YourModel is your models builder model and BlogIcon is property on your model.
@inherits UmbracoViewPage<YourModel>
@using FaLinksPropertyEditor.Models
<div>
    <span class="icon">
        <i class="@Model.BlogIcon.ClassName"></i>
    </span>
</div>
@Html.Raw(Model.BlogIcon.Svg)
Using multiple icons in your front-end razor view
When the the maxium is not set to 1, then it's assumed multiple icons can be returned, so the strongly typed property will be an IEnumerable of the Icon class:
var blogIcons = Model.Value<IEnumerable<FaIcon>>("blogIcons").ToList();
Then to loop through the list of of icons would be:
@foreach(var blogIcon in blogIcons)
{
    <i class="blogIcon.ClassName"></i>
}
Avoiding null reference errors
When a value has not been set for the property then the returned object is null. This will cause a null reference error on the front-end. To stop this occurring you should always check for null before using the property.
@if (Model.PageIcon != null)
{
    <i class="@Model.PageIcon.ClassName"></i>
    @Html.Raw(Model.PageIcon.Svg)
}
Font Awesome Links
Having discussed the Font Awesome Icon, we go onto Font Awesome Links. This property editor allows you to assign a Font Awesome Icon to a link. The usage instructions are the same as above, with a few additions.

Font awesome list of links with assignable classes
You can select a link that is associated with an icon, and you have the additional option of setting a list of class names that can be picked from, say for example I have some CSS classes that will make the link a button using the primary color scheme. I would then add a friendly name "Primary" then the class name "is-primary" in the second field.
I also want to decide on the size on the button, so I can then utilise the secondary class drop down settings to add button sizes, eg: "Medium Button" for the name, and "btn is-medium" for the class.
Once you have assigned your property editor to a property on your document type then you can add an icon, select a link and also choose your primary and secondary classes.
Using the Font Awesome Links in your front end razor view is almost the same as when rendering the icons, however the model used is of type "FaLink", eg:
var pageLinks = Model.Value<IEnumerable<FaLink>>("pageLinks").ToList();
@foreach(var faLink in pageLinks)
{
if(faLink != null)
{
if (faLink.Link.HasValue())
{
<a href="@faLink.Link.Url" class="@faLink.PrimaryClass @faLink.SecondaryClass" target="@faLink.Link.Target">
@if (faLink.ClassName.HasValue())
{
<span class="icon @classListIcon">
<i class="@faLink.ClassName"></i>
</span>
@:
}
@faLink.Link.Name
</a>
}
}
}
Font Awesome Buttons
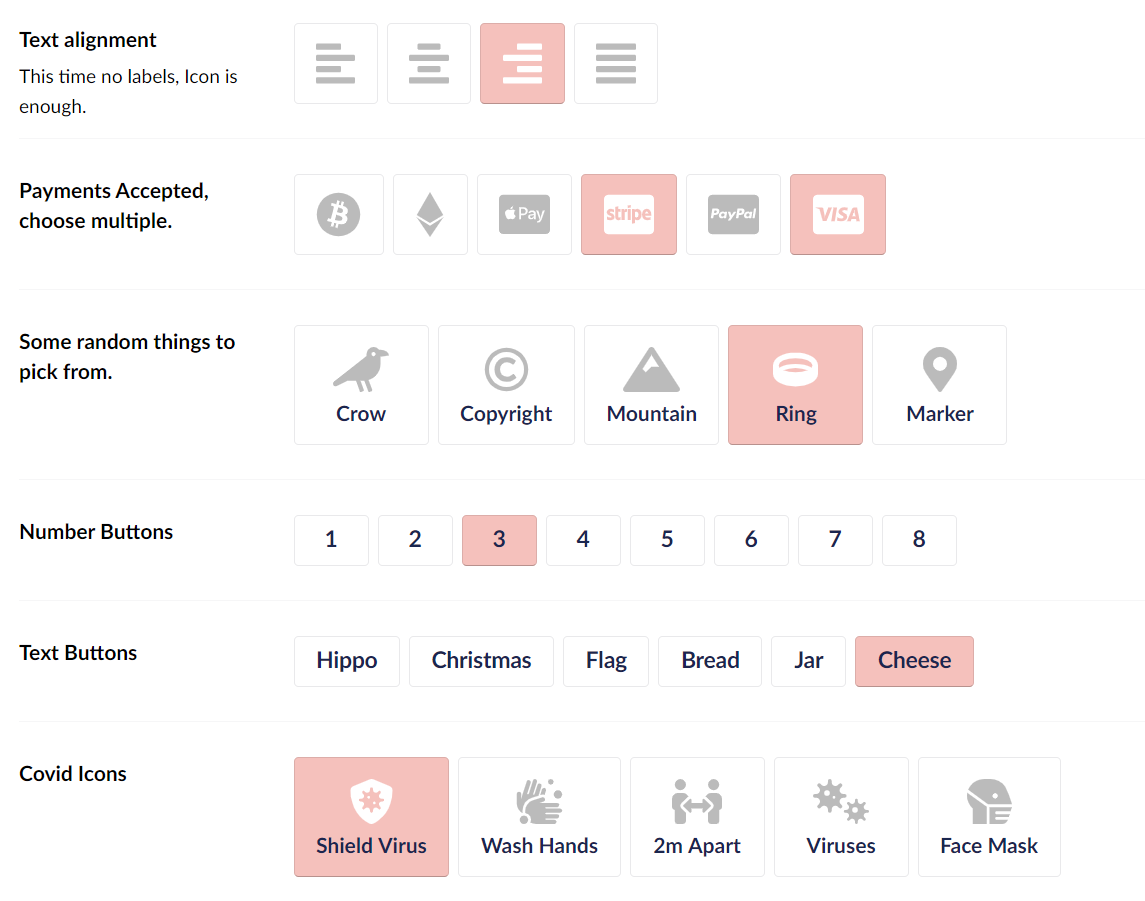
Use the font awesome buttons property editor to add button lists. This is really simple to set up, just choose your optional icon, and set a label and value. Then select if one or many buttons can be selected.

Various use-cases for buttons: text alignment, payment types, numeric and more.
This wraps up how to use our Font Awesome Extension, as you can see, its a highly configurable property editor that will supercharge your editor experience.
As always, thanks for taking the time to read this, please reach out to me if you have any comments or suggestions.
Happy Umbracoing!
-- Matt

