This tutorial goes through the steps for adding a free SSL certificate from Let's Encrypt to your Umbraco site quickly.
What is SSL and why it matters
Secured Socket Layers or SSL is a method for ensuring that data going to or from your website is encrypted rather than being sent in plain text.
Sending data between your Umbraco website and your users without encryption means that what you send could be viewed or stolen. This is where SSL steps in, it prevents third parties accessing your data. A lock icon is added to the browser bar when the HTTPS protocol is used.
Who are Let's Encrypt?
To enable SSL you need to get a certificate from a certificate authority, the certificate authority will only give you a certificate if you can prove you have control of your website's domain.
Let's Encrypt are a certificate authority, they allow you to prove domain ownership via the ACME protocol, typically this involves running some software on your website's server.
How install your free SSL certificate with Windows ACME Simple (WACS)
Head over to WACS and download the ACMEv2 client software, unzip and run it on the windows server that is hosting your site.
If like me, you have your own virtual server (mine is via Amazon AWS), then you have complete control of what software you can install there. So log in via remote desktop to install the WACS software, now follow these steps for installing your free certificate:
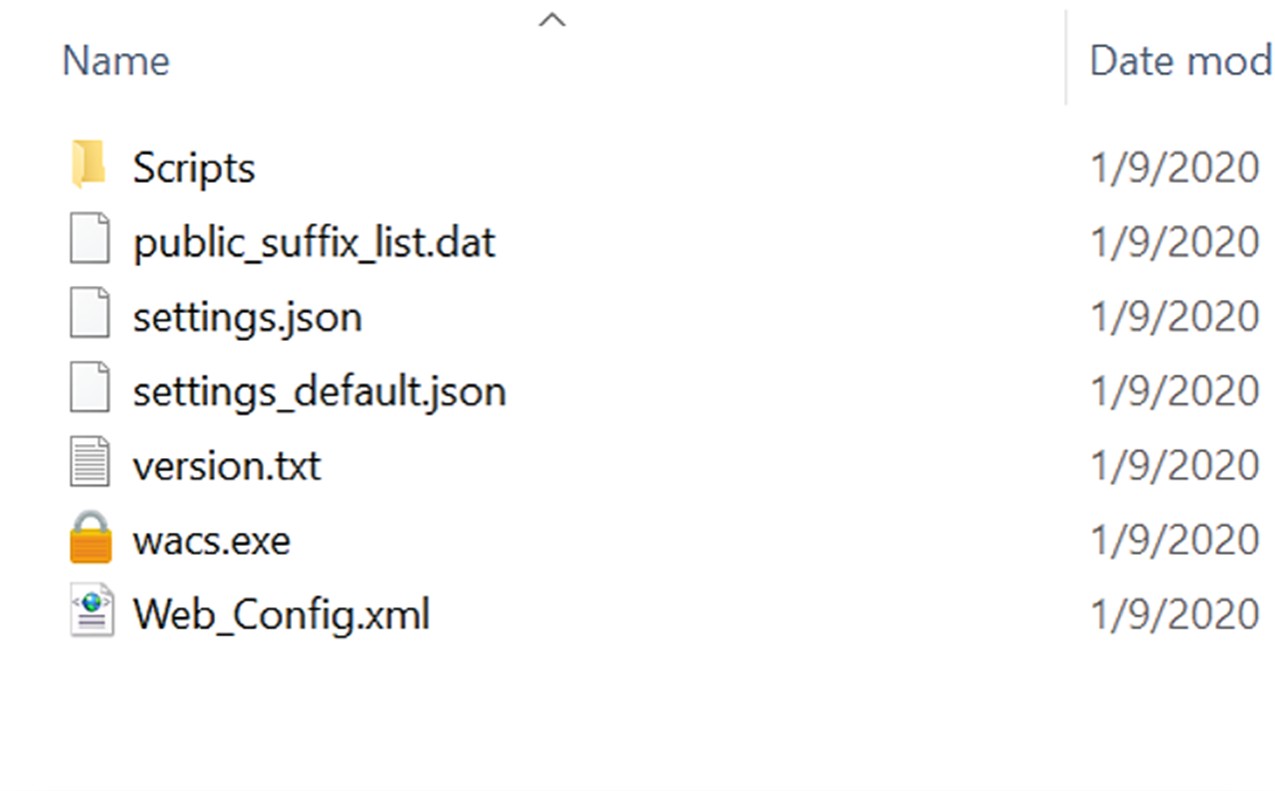
Unzip the files and double click wacs.exe to run the software on your server, After you run the software a console screen will appear.
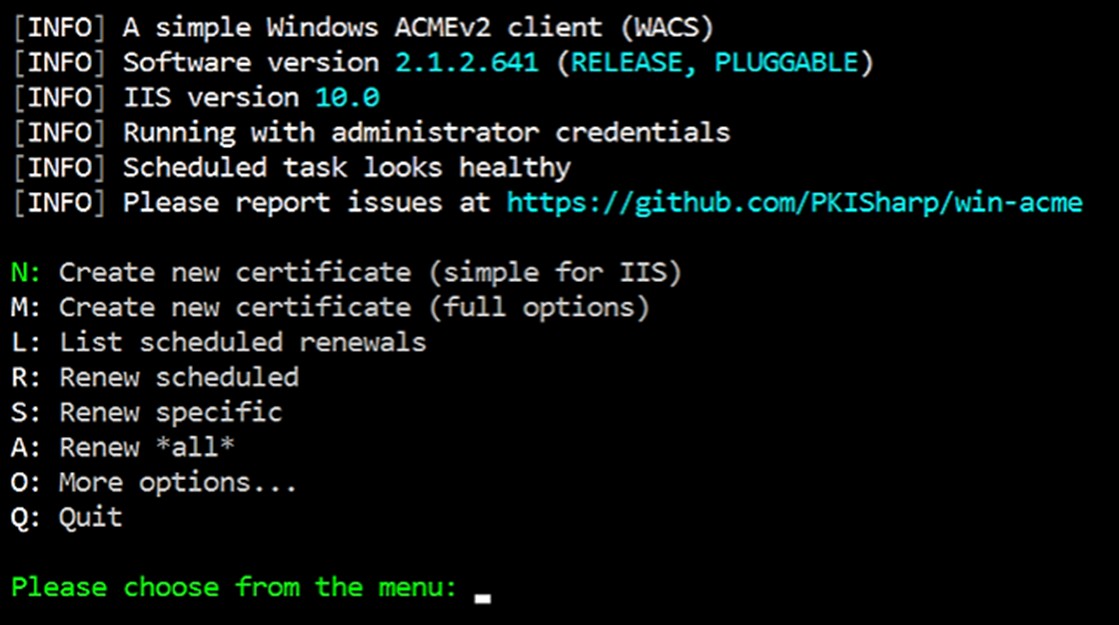
Type N to add a new simple SSL certificate.
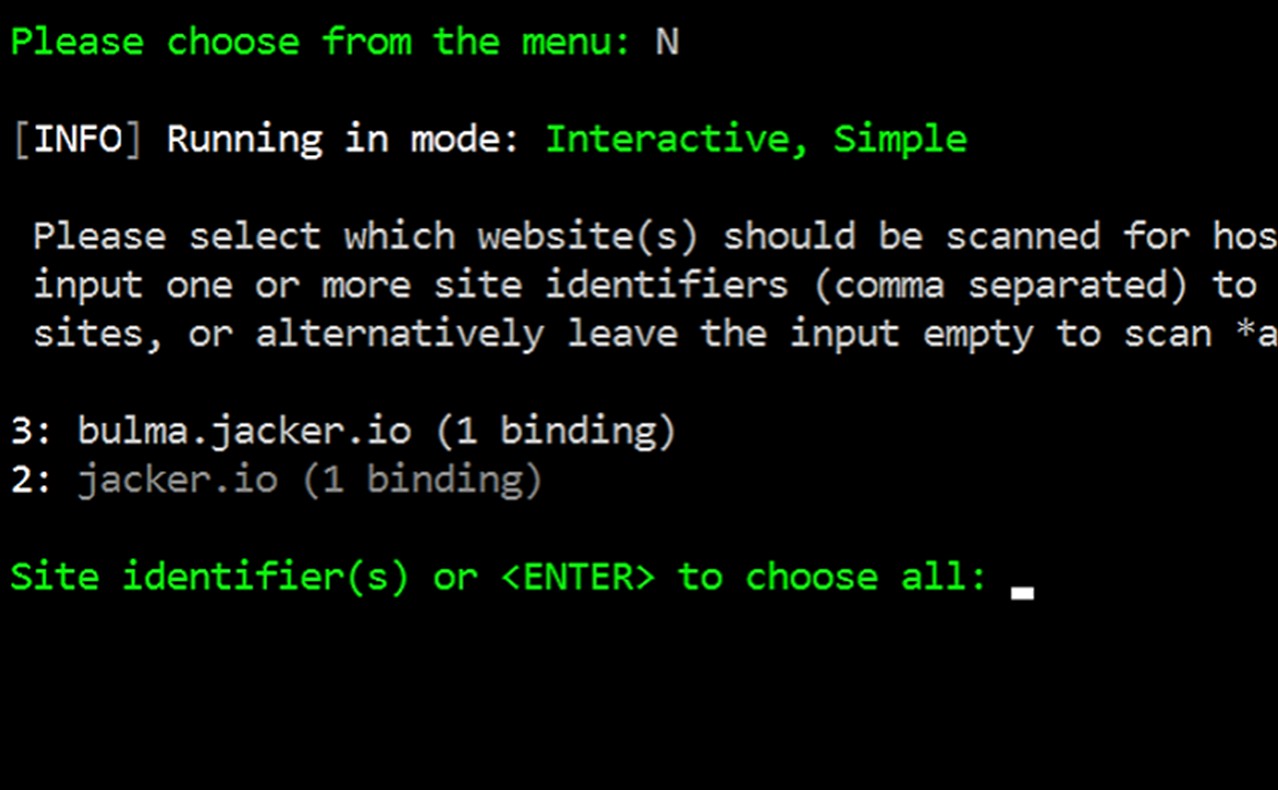
Choose which IIS site you want to bind to. In this case I want to bind to bulma.jacker.io, so I press 3. You can also choose to install a certificate on all your sites.
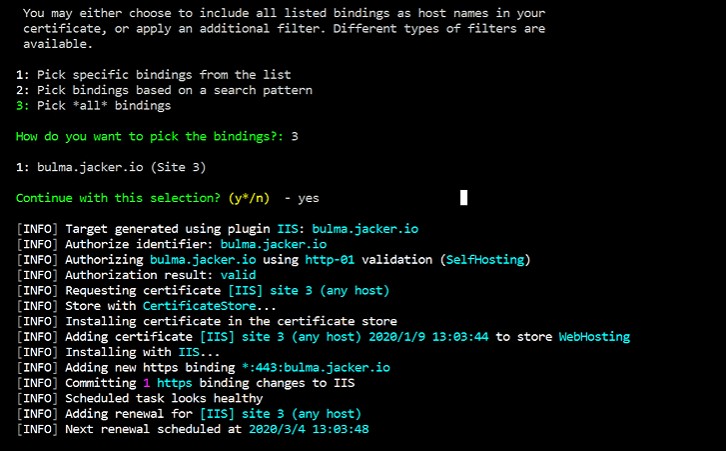
I want to pick all bindings, so I press 3, then press y to continue.
That's it! Pretty simple! This has now installed an SSL certificate on my Umbraco site.
Wrapping up and verifying your new certificate is installed
On your windows server, open your IIS manager, find your site, then click on the bindings to verify that the https certificate is applied.
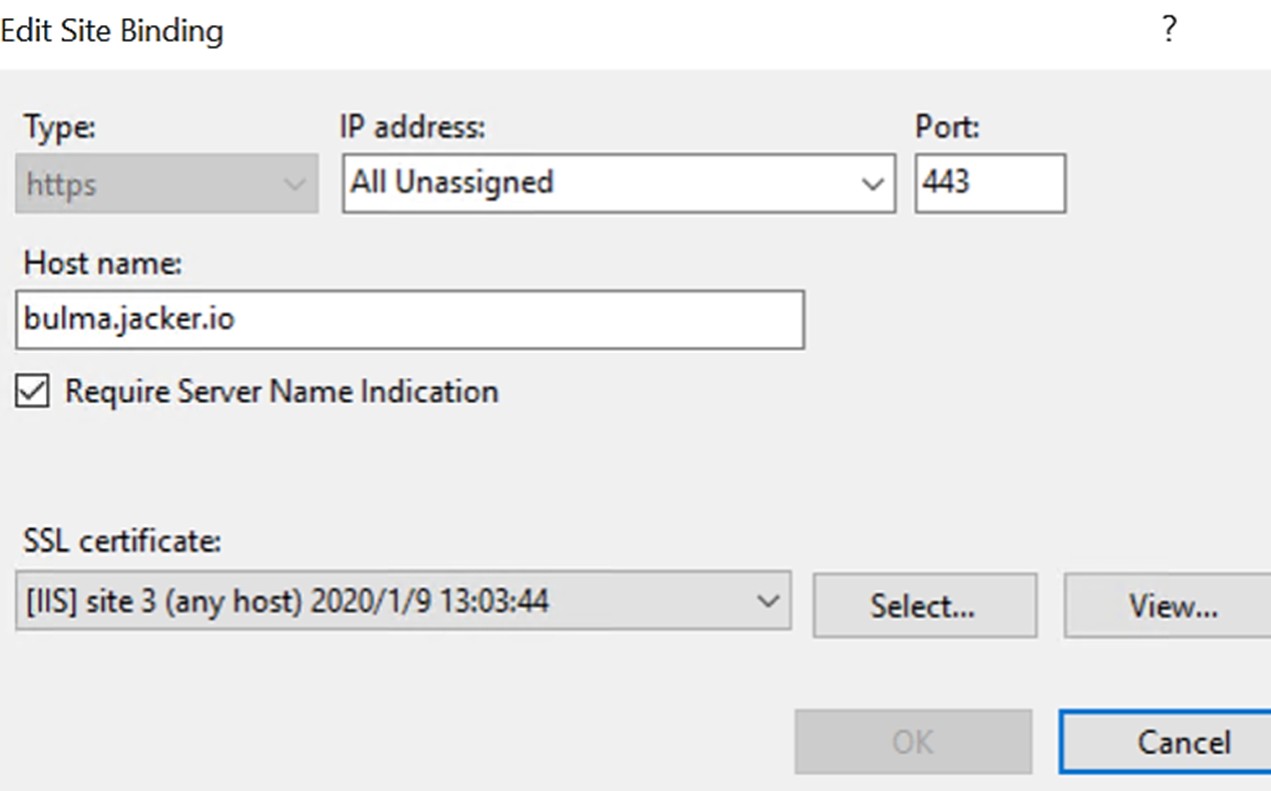
Go to IIS manager to verify that the SSL certificate binding has now been applied to your site.
You can verify the SSL certificate has been install by visiting your Umbraco website using the https protocol.
As an added bonus the WACS software also installs a scheduled task that will automatically renew certificates when needed. Awesome, no more need to worry about buying and renewing SSL certificates!
That wraps this tutorial up, I hope you can see how quickly and easily is is to install free SSL certificates on your server from Let's Encrypt via the WACS software.
As always, thanks for taking the time to read this, please reach out to me if you have any comments or suggestions.
Happy Umbracoing!
-- Matt

